
Beginner’s Guide to Rose Embroidery
Unlock the beauty of embroidery with this simple rose pattern! Whether you’re a beginner or just enjoy the art, this pattern is perfect for creating stunning designs.
Embroidery is a beautiful craft that allows you to create stunning designs with just a needle and thread. If you’re a beginner looking for a simple embroidery pattern to start with, look no further than this lovely rose design. With minimal stitching knowledge required, you’ll be able to create a gorgeous piece of art in no time.
For this project, we’re going to use what’s called a woven wheel stitch and fishbone stitch.
Materials Needed
- Embroidery floss in
- Pink (or color of your choice)
- Green
- Embroidery needle
- Fabric
- Embroidery hoop
Stitch Techniques
For this project, we’ll be using two different stitching techniques:
- Woven Wheel Stitch: This stitch will be used to create the center of the rose and give it a beautiful textured look.
- Fishbone Stitch: We’ll use this stitch to create the leaves of the rose, adding a realistic touch to the design.
Getting Started
- Download the rose pattern image for reference.
- Before you start embroidering, make sure you’re familiar with the general instructions for embroidery basics, such as separating and knotting your threads.
- Note that in certain steps of this project, you’ll need to bring your needle to the middle of the thread and tie both ends together, like a sewing needle. This is only required where you see “doubled” in the thread description and will help speed up the weaving process.
Embroidering the Roses
Center Spokes
Using 6 strands of pink, create 5 spokes in the shape of a star in the middle of the circle. This will serve as the base for the rose.

Creating the Big Rose
Using 6 strands of pink (doubled), bring your needle and thread up next to the middle of the star you created. Choose a clockwise or counterclockwise direction and weave your needle and thread under the nearest spoke. Skip the next spoke and go under the one after, and continue in that direction, weaving loosely around the circle. Remember not to pull too tightly, as you want the thread to fall into place naturally. As you go around, the spokes you go under and skip will change, ensuring an even distribution of thread. When the spokes are full of thread, insert your needle back through the fabric under the rose.

Creating the Small Rose
Using 6 strands of the other shade of pink, follow the same steps to create any smaller roses in your design.

Embroidering the Leaves
Using 6 strands of green embroidery floss, we’ll use the fishbone stitch to create the leaves of the rose.
- To start, make one long stitch to indicate the center of the leaf from the tip.
- Bring your thread back up next to the tip on one side, then insert your needle halfway down the leaf on the opposite side of the center thread.


- Repeat the same process for the other side, crossing over the previous stitch to create an “X” over the middle stitch. Continue alternating sides, going parallel just under the last stitch made on each side. Once one side is full, use a satin stitch to fill in the rest of the leaf, going at the same angle. Repeat this process for any remaining leaves.


Final Touches
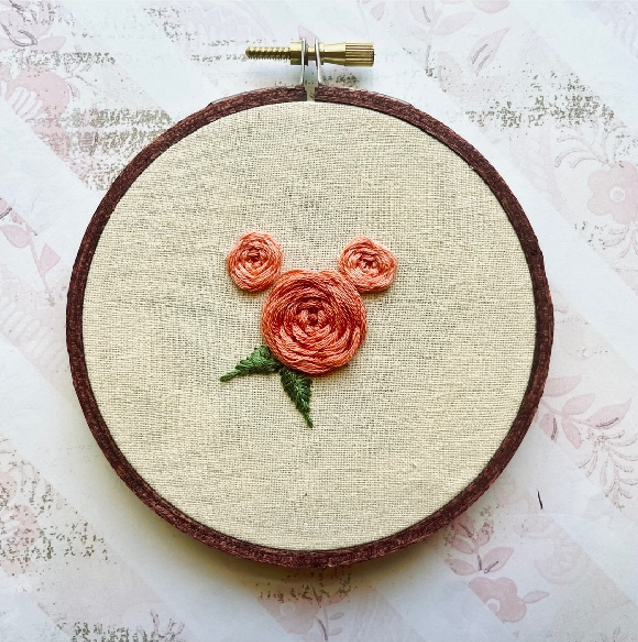
Once you have finished embroidering the roses and leaves, step back and admire your beautiful creation. The woven wheel stitch and fishbone stitch have brought the roses to life, with their vibrant colors and delicate details. Display your finished embroidery in a frame or use it as a decorative patch on clothing or accessories.
Enjoy the process of embroidery and the satisfaction of creating a stunning piece of art with your own hands. Happy stitching!


