
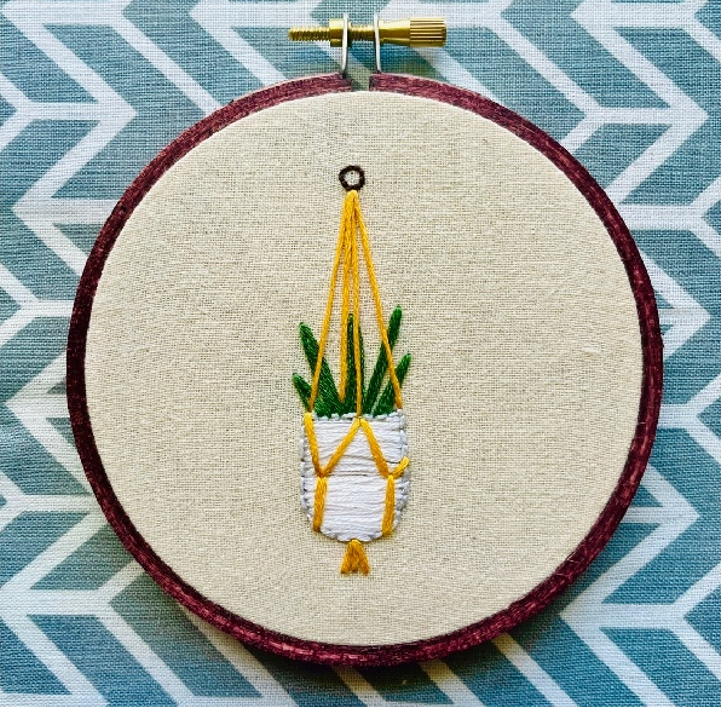
Bringing nature indoors with this stunning plant embroidery and macramé combo.
This simple embroidery pattern is perfect for beginners as it required very little knowledge of stitches
For this project, you will just be using the satin stitch and the back stitch
Please see General Instructions page for further guidance on embroidery basics, such as separating and knotting your threads.
Transferring Your Image
There are a few difference ways to get your image onto the fabric.
- Sulky Sticky Fabric-Solvy (preferred): This is a printable sheet of water soluble sticker paper. It feels like fabric and it’s the perfect way to get your exact design on your project. You will see me using this in all my embroidery tutorials.
- Pilot Frixion Heat Erasable Pens: These pens are great for drawing fine lines, just take a hair dryer to erase any unwanted marks. However they are technically not meant for fabric, and when exposed to low enough temperatures, the lines with return on your piece. It is a simple fix, but potentially a nuisance, so just be aware of this if using.
- Water Soluble Pen/Marker: There are many brands that make a product like this, they are usually meant for fabric and wash away very easily. The only downside to this method is the “pen” can often be the thickness of a fine marker, making lines thicker than potentially desired.
To transfer with pens, you will need a light source to help trace your designs from paper. If you don’t have a light pad, you can also use the nearest window, tablet, or even your phone for a design this size. A glass table can also be a near-perfect replacement!
Colors
For this design, I will be using the following colors, but you can substitute where you like
- White: DMC Blanc
- Green: DMC #3362
- Yellow: DMC #742
- Brown: DMC #938
Pattern Instructions
Pot
Using 6 strands of white.

Fill in the plants pot with what’s called a satin stitch. You’ll do this by stitching long horizontal lines across the pot, bringing your thread up through one end and out through the other. Do this until the pot is full. Don’t be afraid to cover the lines underneath. When we get to that step, you will still be able to peak under the stitches to see them as guides, or use my simpler suggestion.
Tip: you can divide this section up with a few stitches across, then work in sections to help keep your lines straight
Tie off your thread at the end of every section. For tips, see General Instructions.

Using 3 strands of white.
Outline the pot with that’s called a back stitch. To do this you will start anywhere on the outer edge, bring your needle up through the fabric and back in to make a normal short stitch like your are sewing. Bring your needle back up through the fabric leaving a space about the size of your first stitch, then insert your needle where the last stitch ended. This should make one conjoined line, continue this around the whole pot.
Leaves
Using 3 strands of green
Outline and Fill the leaves with the same long stitches you used in the first step.
Tip: start each stitch at the bottoms of the leaves, this ensures
your needle always comes up through a fresh spot.

Bringing your needle up through a hole with an existing long stitch could cause it to fray or loosen. So this can be ignored for the first stitch on each leaf.
“Macrame” Style Holder
Using 6 strands of yellow
Create the plant holder with one long stitch for each of the 4 lines at the top. You can use your needle to temporarily move and peak under
the white filler stitches to see the lines you need to make on the bottom part. You can also ignore this design and make your own lines to “hold” the pot. For this you could do one big “X”, “Y” or “V” shape. Whatever you want!


Tip: when stitching into the white filler stitches, try to insert your needle through the thread stands rather than in between the lines you made to fill. This helps ensure your filler stitches don’t get pulled apart exposing the fabric underneath. Continue at the very bottom to make the fringe with 3 medium stitches
If using Sulky Stick and Stitch: after rinsing off the sticker and reloading your hoop, you’ll likely want to readjust the tightness of the extra long stitches. Do this by tugging at the thread gently in the back where those stitches come though. You may need to do a couple of adjustments on both sides before you can get them right and tight in the front.
Optional:
Using 3 strands of brown
Make the ring at the top by using very short back stitches to outline the circle. Short stitches work best when working on curves.

You’re done stitching! See General Instructions for rinsing off the sticker and backing your piece.
Enjoy!


