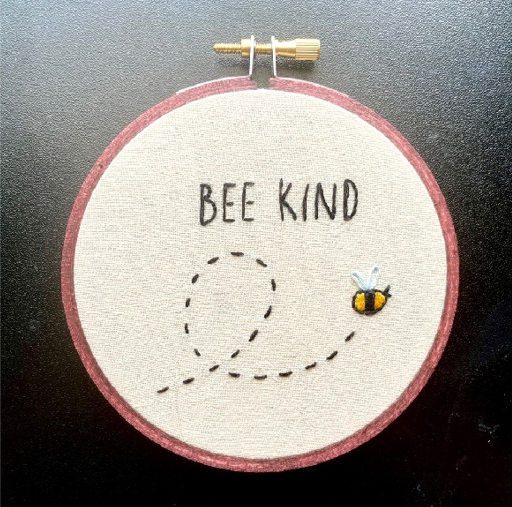
This simple embroidery pattern is perfect for beginners as it required very little knowledge of stitches
For this project, you will just be using the back stitch and satin stitch
Please see General Instructions page for further guidance on embroidery basics, such as separating and knotting your threads.
TEXT
Using 3 strands of black
For this you’ll be using what’s called a back stitch. Start with the “B” and make one long stitch along the straight part, like you are sewing. For the curved lines, you will need to use short stitches. Bring your needle back up through on the curved part only a small distance away, then insert your needle where the last stitch ended. Continue doing this with short stitches on the curves of the letters and long stitches for the straight parts.


BEE
Trail
Using 3 strands of black
This step will use a simple running stitch. If you’ve ever done or seen anyone sew, this is probably what it was. This stitch just incudes making short stitches with small distances in between them, like a dashed line.
Don’t tie off your thread yet.

Body
Using the thread from the last step
Fill in the black section in the middle of the bee using a satin stitch. This just involves making a few close stitches side by side. For this part, it’s best we do these stitches vertical going from top to bottom.


Using 3 strands of yellow
Do the same steps as before for the blank sections of the bee. Make your stitches shorter as you come to the curve on each end, until there’s just one very short stitch on the butt and front.
Outline and Antennae
Using 3 strands of black
Outline the bee using short back stitches. When you’ve reached the end, make 2 small stitches for the antennae.
Wings
Using 3 strands of pale blue
To make the wings, we’ll use a stitch commonly used as flower petals. This one is called the lazy daisy stitch because it’s so easy.
Starting at the bottom of one wing, pull your needle and thread up and back down into the same hole to make a loop but don’t pull it all the way through. Stick your needle back up into the tip of the wing, and through this loop. Pull up toward the tip to tighten the loop and bring your needle back through the fabric, right above the hole you just came out of. As you tighten, you should see the loop take shape as the wing.


Alternatively, you can use the blue or the rest of your black to outline the wing with short backstitches instead of the lazy daisy.
You’re done stitching!
Enjoy!


